

![]()

Diary listings have the most recent entries at the top. You can start reading the first entry here. Originally posted in my LiveJournal blog.
Italian Bonnet finished
|
|||||||||
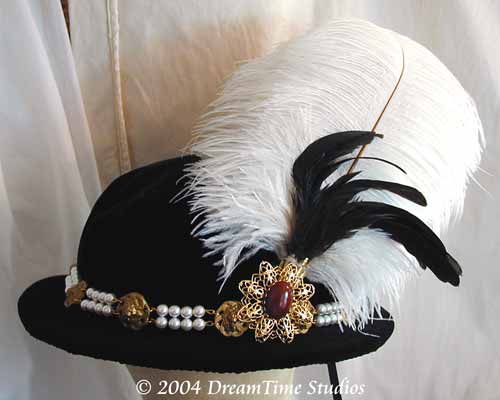
| Black Velveteen Hat with Feathers and Jeweled Band | ||
 |
 |
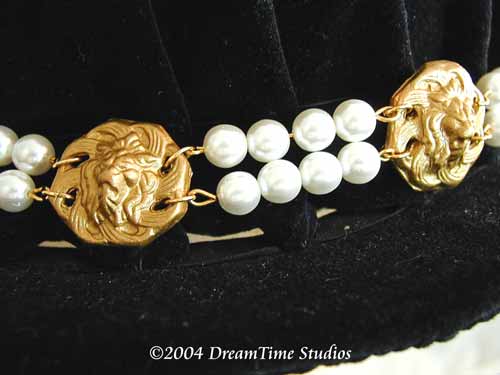 |
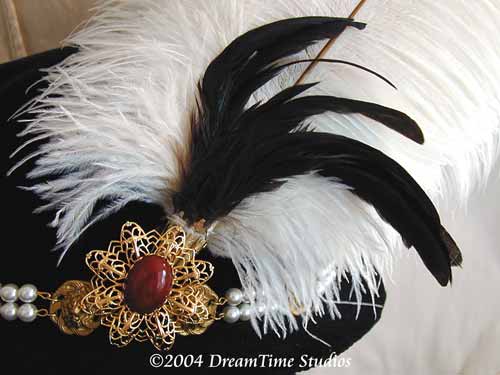
| Black velveteen hat in full view | Detail of hat feathers (multiple ostrich and cockle) and main hat jewel (carnelian stone center) | Detail of lion heads and 8mm pearls band |
Next dress diary entry will have photos of my husband wearing what has been made so far. I still have the sleeves and coat to make up, but that will have to wait till I get my own stuff made.
{Previous|Finis!}
Italian Bonnet - an update on the brim and
more
July 12, 2004
I had to take time out for Mom, and her treatment appointments are around Cam's nap time, which is my daily sewing time. So until today I haven't done much on the hat at all.
I finally got the hat brim finished, with the adjustable sweat band part. Thing is, now the hat is a bit too big for c0demonkey or me. In order to put the band on, part of the inner seam of the brim had to be cut away, and it was that inner seam that helped it fit our heads. So much for making sure the pattern is loose by two fingers. So, I may end up making another hat for c0demonkey if this, when completed, is still a bit too big. It doesn't fall down his ears or anything, but there isn't a point to it being too big either. I guess we shall see.
And I am wondering if that adjustable head sweat band thingy is worth the extra ribbon. I may have to see who else it fits and how before making a final decision.
Next up is the crown, which is already sewn together and ready to make the pleats. Then it goes onto the brim.
I did manage to find a lot of white ostritch feathers for cheap on eBay. I hope they come in soon enough. I bought enough to make a few hats with, as I plan on doing other hats as I get the time.
That's it for now. I would take pics, but with black velvet, there isn't much detail to see, and I am too tired right now. Time for bed!
Making an Italian bonnet
June 27, 2004
I have been spending a lot of today, alone, on my own, no son or husband to worry about. It's been wonderful! I need breaks like this more often, time to do what I want and just get lost in it.
Most of today has been spent working on my first official hat, using the old milinary techniques I have read about. I have made hats before, like a basic flat cap that was embroidered with a celtic knot (and still alive today), a beaded pill box and a French Hood. But this is a proper hat with all the proper buckram and wires, and it isn't going to be all floppy and badly made, with guessing how the hat goes together. I am making it for my dear husband, c0demonkey.
I am using the book From the Neck Up, by Denise Dreher, and Lynn McMaster's Men's Italian Bonnet pattern {view B}. I am modifying Lynn's directions, which are geared to basic home sewing skills. Not that hat making is hard, but the older methods use a lot more handsewing than Lynn's patterns, which either glue things, or use the sewing machine more. It will be a sturdy hat, as I have both a crown buckram (two layers) and a medium buckram sewn together, as Lynn and others have suggested. This hat should survive faire.
I like the pattern pretty much, although the brim is rather smallish it seems. Thankfully, dh and I both wear the same size, so I can test it on my own head. I sewed the buckrams together, cut it out, wired and covered the wire to the outer brim edge yesterday. The book mentions straightening out the wire before attaching the wire to the hat, which Lynn doesn't mention in her directions. It really helped me to already have a pearl foot for my sewing machine, which helped a lot in channeling the wire alongside the buckram, and zigzagging over the edges.
Today I mulled the buckram form, cut out the the velveteen fabric and am now handsewing it into place. This is what I am taking a break from. It is a lot of handsewing time, but it looks really nice, smooth and very flat.
If I do these hats as part of my business, I expect I will do more machine sewing, but it wasn't nearly as accurate in the placement of the seams as the hand sewing seems to be. I tried pinning the top and bottom fabrics together, and if I got one side flat and smooth, the other side was off somehow. That's partly why I decide to hand sew the hat instead.
I am also timing myself, for two reasons. Reason One is to see just how long it takes a beginner to sew this hat, in case I teach a class, which I may do so for Isle of Mann. Reason Two is to see how much I would end up charging for another hat like this, taking my time into account. I know I will go faster the more I learn, and if I machine instead of hand sew the hat, but it gives me a ballpark figure of time on the very outside of things.
But this hat for all it's travails is rather fun to do. Or at least the brim is. The next part will be the top of the hat, which also needs some handsewing, as it is gathered into the brim.
More later on the hat when I get another break. Back to the handsewing, just as soon as I find some more interesting music to listen to. I miss that as well.
{Next}
Home
Creative Blog
Kimiko Small Designs
Joan Silvertoppe's SCA Resumé
Warderobe Accounts
Brodyworke Accounts
Scriptor Arts Folium
Tudor Research
Workshops & Articles
Inspiration Gallery
Largesse
Favorite Links
About Me
Contact Me
http://www.kimiko1.com
Entire website, graphics, and text (unless otherwise stated)
© 2003-2013 Kimiko Small, All Rights Reserved